前言
这个其实是我很长一段时间之前弄的了,不过当时没有发出来(现在发出来水一下博客)
刚开学那会我在学校的某群吹水时,听说了微机室电脑有控制软件可以让老师看屏幕,于是在第一节微机课的前一天晚上连夜弄了一下这个
正文
0x01 Find
想要伪造画面,自然要用到Hook技术,可是要Hook哪里呢?
这里先贴一段截屏代码供参考
1 | BOOL WriteBmp(const TSTRING &strFile, const std::vector<BYTE> &vtData, const SIZE &sizeImg); |
CreateDCA和CreateDCW?
研究截屏的实现代码,首先可以想到CreateDCA和CreateDCW两个点,把程序拿到的屏幕DC替换掉
但能够发现,GetDC(0)和GetDC(GetDesktopWindow())也能拿到截屏用的DC,这样我们又多了一个需要Hook的点,并且可能还有更多方法来获得这个DC
还有,屏幕HDC并不一定只是用来读的,如果替换掉屏幕DC,很可能影响程序的正常显示
因此,这个Hook点是不能用的
BitBlt和StretchBlt
再看一眼,我们可以发现,为了把屏幕DC中内容读出,也就是copy出来,在上面的示例代码中用到了BitBlt和StretchBlt,实际上也就只有这两个API可用
这两个API的操作方向在参数中又是明确的,我们可以对参数进行确认避免误伤,所以这两个点不失为好的选择
0x02 Hook
决定了Hook的点,我们就可以开始Hook了
在这里,我们将用到MinHook这个简洁而好用的库来进行Hook操作
为了判断一个DC属不属于屏幕设备,我们可以判断他的三个属性:TECHNOLOGY、HORZRES和VERTRES是否和屏幕设备相同
如果确定了一个DC属于屏幕设备,那我们就可以把准备好的伪造画面代替原DC复制到目标DC中,伪造完成
为了方便进入别的进程进行Hook操作,我们将用一个DLL进行全部操作
同样贴出代码供参考
1 | std::map<PVOID, PVOID> hookMap; |
这份代码将DLL加载时的屏幕保存,并将以后的截屏内容都替换为保存的内容
0x03 Inject
DLL已经完成,我们剩下的唯一任务就是把DLL注入到目标进程
在这里我们将使用QueueUserAPC这个比较稳定的方法进行注入
当然,注入一个DLL还有很多不同的方法,也许以后我会写一篇博客专门介绍一下
参考代码
1 | void ByQueueUserAPC(PCSTR pszLibFile, DWORD dwProcessId) |
0x04 Test
至此,我们需要的东西已经准备齐全
让我们测试一下成果
打开我们的OBS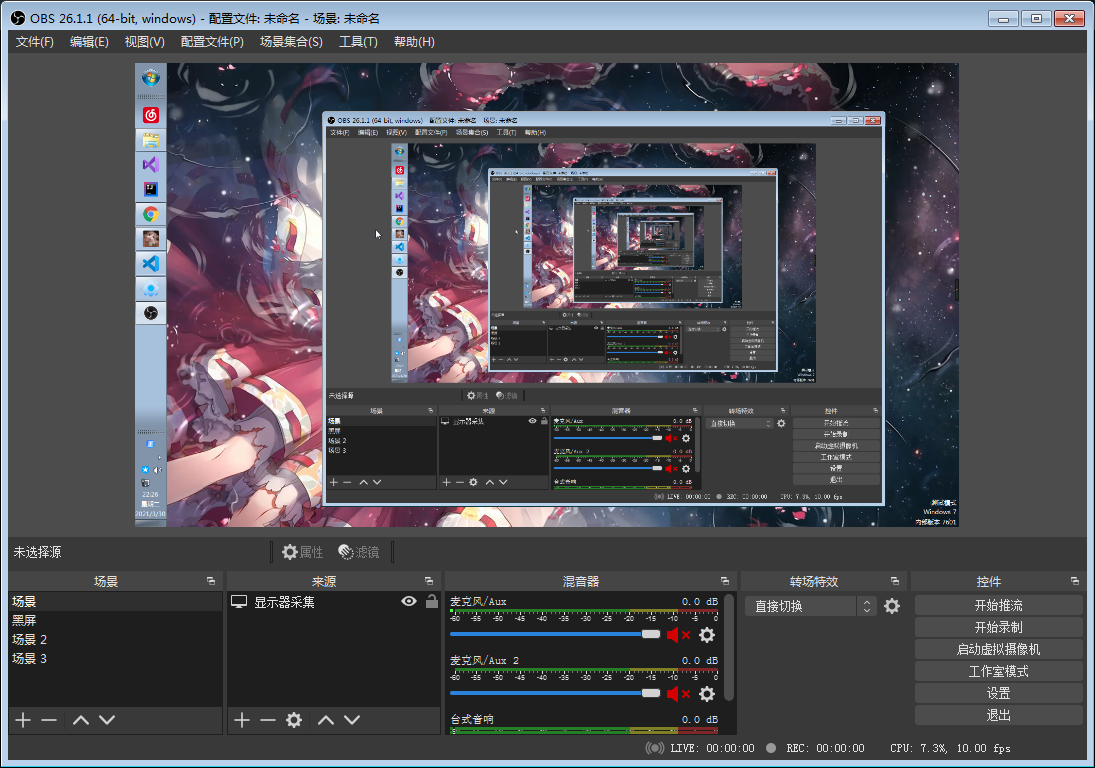
用我们的工具注入一下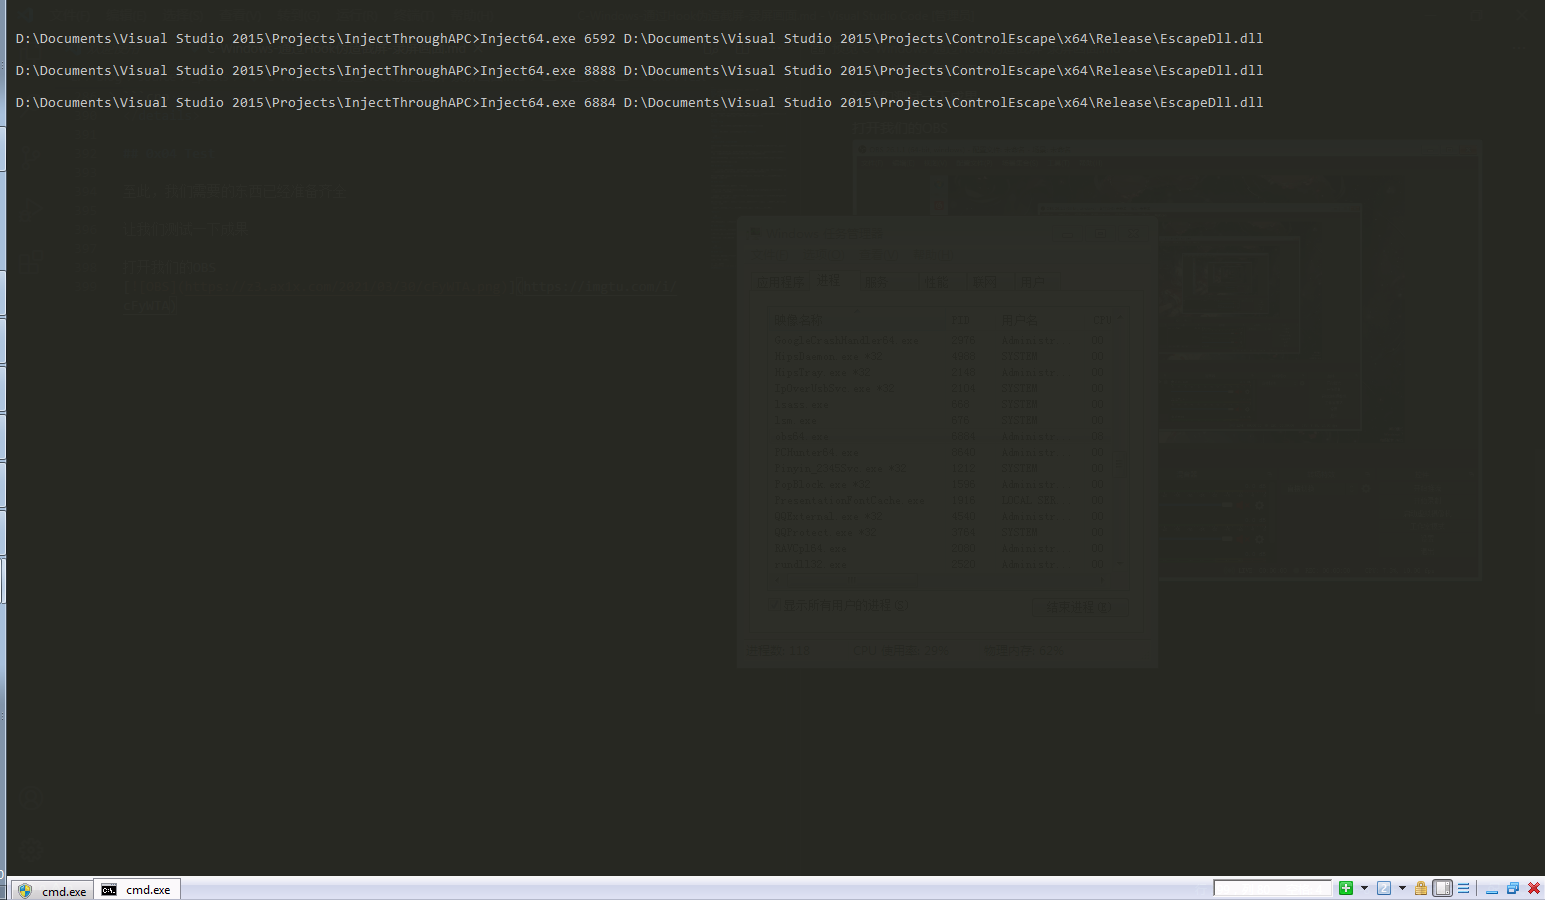
再看我们的OBS,钩子已经挂上,预览画面的时间定格在注入的一刻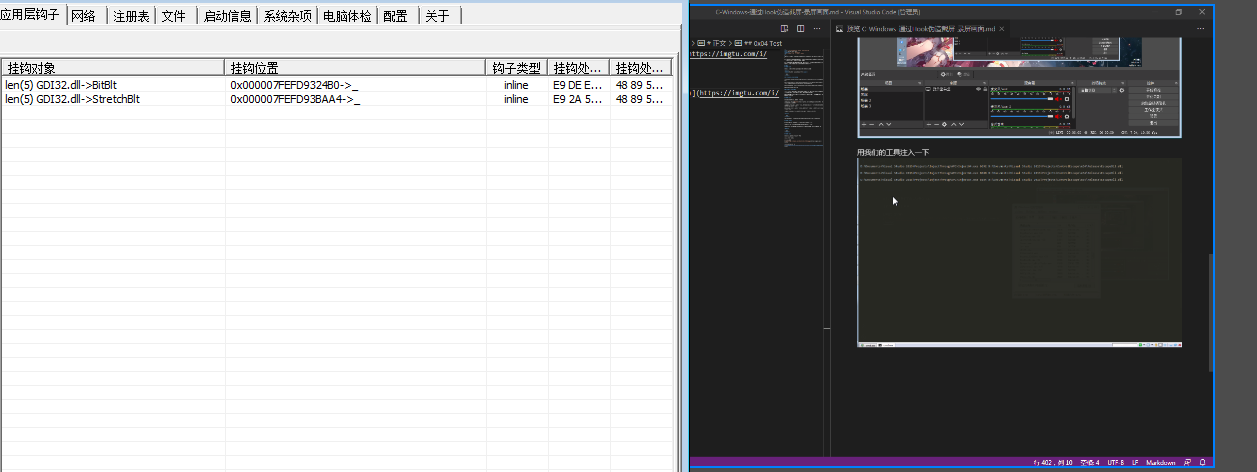
除了OBS的界面显示出了一些问题之外没有什么大问题,还挺不错
结语
然而,学校的古老XP系统并不支持我运行这个程序,再加上后来我发现我直接关掉软件老师也不管,于是这东西就没用了(当然,可以用来水博客)